Super-User Guide
Overview
Super-Users, also called administrators or lab managers, have full administration and management permissions. They can do everything users can, and more.
Dashboard
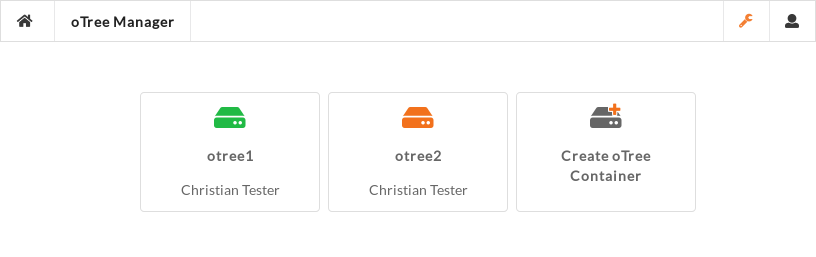
For super-users, the dashboard shows all active oTree containers, independent of the assigned experimenter. In addition, it shows an icon to create a new oTree container. It also features an orange wrench icon in the top right corner, which opens a menu to quickly navigate to different management pages.
Actions
On the detail view of an oTree container, super-users have two additional actions compared to normal users.


User Account Management
Add new user account
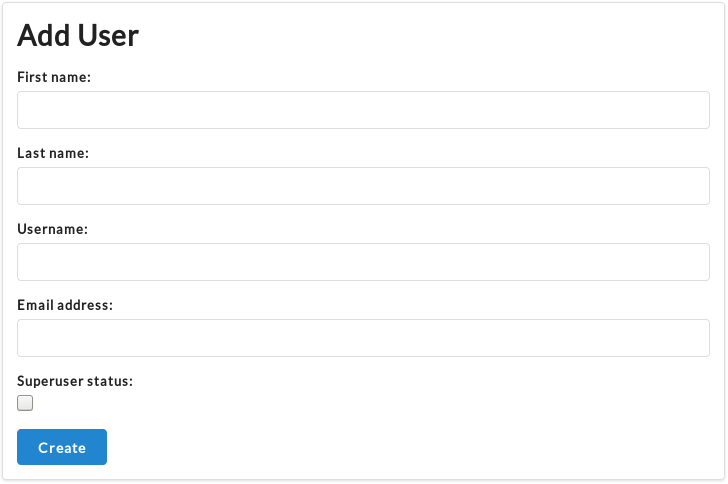
Create new experimenter accounts by clicking the wrench icon and choosing “add user”. Then, fill in the form with the user’s first and last names (used for identification throughout the web interface). Additionally, provide a username. This has to start with a letter and may only contain letters and numbers. Finally, provide an email address and choose whether the new user should also have super-user privileges.
On creation of the user account, oTree Manager will automatically send an email to the new user and ask him/her to set their password.
Edit user account
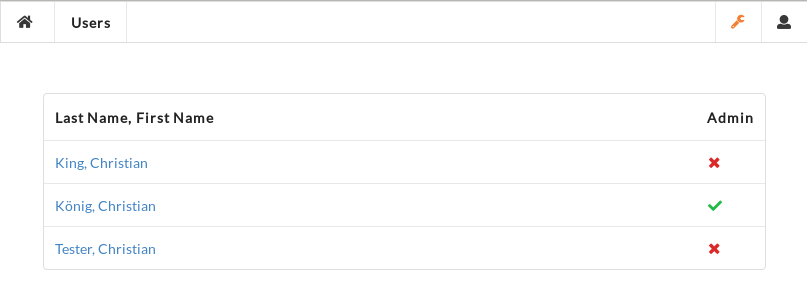
All existing users show up in the user list available from the wrench icon menu. It provides privilege information at a glance. Click on a user’s name to edit their details. User accounts can be deleted. To do so, first remove all assigned oTree containers. Then, choose to edit the respective user account. A ‘delete’ button will be visible.
Container Management
Create new container
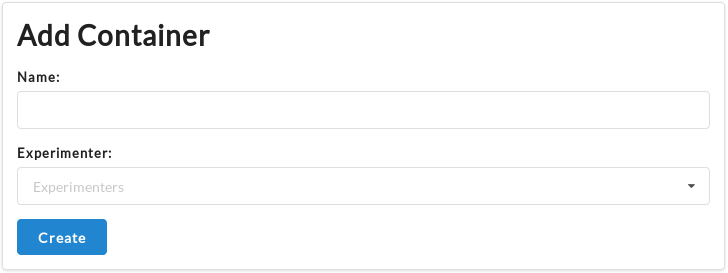
To create a new oTree container, click the button on the dashboard or find it in the wrench icon menu. oTree containers need a URL-safe name which you should choose to be as short as possible, as it will be part of the instance’s URL. Select the experimenter the container belongs to and click ‘create’.
Upon creation of a new container, several processes start running in the background. You will get periodic updates about the status of these processes on the web interface. First, the oTree container is initialized and write permission to the associated Git repository are granted. oTree Manager then starts two docker containers and links them to the instance. One container provides a PostgreSQL database, the other a Redis database. Once these are up and running, the oTree instance is pre-configured for production use. That is, debug mode is turned off, the authentication level is raised to STUDY, and a random password is generated and set for the admin account.
Site Management
Imprint information
You should customize the imprint page to display the information required by your jurisdiction. This typically includes the name of the person responsible for running the website as well as their contact details.
Super-Users can reach the dedicated imprint page editing form from the wrench-menu. Text formatting is done through standard HTML. Special characters are NOT escaped automatically.
Privacy statement
Again, you should customize the privacy statement page to display the information required by your jurisdiction. This typically includes information on which and how data is collected, how it is processed, and who can be contacted to request removal of any stored data.
Super-Users can reach the dedicated privacy page editing form from the wrench-menu. As with the imprint page, text formatting is done through standard HTML. Special characters are NOT escaped automatically.